
For a Christmas party last weekend, I wanted to do another Christmas inspired manicure. I hadn't used the bells on one of my Monster plates, so I decided gold bells with red ribbons would be perfect for the night!


 Still feeling in the Christmas spirit, I did these candy cane inspired tips for the weekend. They were cute and really easy to do free hand.

 For holiday nails!
 Minus the butterflies. I'll paint those later!

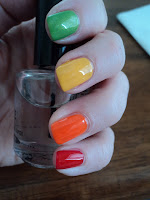
 I decided to do a rainbow manicure after my last striping one. I liked the different colors and I figured I could add a couple more and just make it as close to a rainbow as I could get with only five colors.


 I ordered this magnetic nail polish a few weeks ago and had actually forgotten about it until a friend asked me how it was. So I figured I needed to try it out and let her know.


 I've been wanting to try doing leopard print on my nails for awhile but I wasn't sure how it was going to turn out. At first, I didn't like it at all. It was hard for my perfectionist personality to let go on this one. I didn't want the dots to be perfectly round and the black around the dots isn't supposed to be even. After I finished, though, I decided I really liked it. I will definitely be doing this again with different polishes.